My Cart
You have no items in your shopping cart.

Painting on plexiglass is not only possible but also a popular creative technique when done correctly. Whether you’re designing signs, wall art, or custom home decor, this material offers a sleek, clear canvas with endless possibilities. With the right tools and methods, you can achieve a professional, lasting finish on plexiglass that won’t peel, crack, or smudge.
In this comprehensive guide, you will learn everything you need to know about painting plexiglass, from selecting the right paint to prepping the surface, applying each coat, and sealing your final artwork for durability. Whether you are a DIY enthusiast or a hobbyist artist, this step-by-step guide will ensure flawless results.
Table of Contents
Absolutely! Many people wonder, “Can you paint plexiglass?” The short answer is yes, but with some preparation. Unlike porous surfaces like wood or canvas, plexiglass is a smooth, non-porous material. That means paint doesn’t naturally adhere to it as easily. However, when you properly clean, sand, and prime the surface, painting plexiglass becomes simple and effective.
There are different types of paints suitable for plexiglass:
Before you start your plexiglass painting project, gather the following materials:
Having everything on hand will make the process more efficient and less prone to mistakes.
Preparation is arguably the most important part of painting on plexiglass. A poorly prepped surface will result in chipping, streaking, or peeling paint later on.
Use rubbing alcohol or an ammonia-free glass cleaner to wipe down the plexiglass. Remove dust, grease, fingerprints, and static. Let it dry completely.
Using fine-grit sandpaper (220–400), gently scuff the surface. This helps the paint grip better. Don’t sand too aggressively, you’re aiming for a slightly frosted look.
If you want clean lines or specific designs, use painter’s tape to section off the sheet. This also protects areas you don’t want painted.
A primer designed for plastic or acrylic will significantly improve adhesion, especially if you’re using regular acrylic paint. Spray-on primers work best for even application.

Now that your surface is ready, let’s dive into the actual painting process. Follow these steps to get vibrant, long-lasting results.
If you’re going for bold, opaque designs, use acrylic paint with a brush. For smooth, even coverage over larger areas, spray paint plexiglass with a plastic-bonding formula. Both types work well, just be sure the paint is compatible with plastic materials.
Allow the first coat to dry fully before adding more.
Drying times vary depending on paint type and room conditions. Typically, wait at least 1–2 hours for acrylics and 10–30 minutes for spray paints between coats.
Most designs will need 2–3 coats for solid color and opacity. Let each layer dry before adding the next.
After the final coat has dried for several hours (preferably overnight), apply a clear acrylic sealant or polyurethane spray to protect the painted surface. This prevents scratches, peeling, and UV fading over time.
Spray painting plexiglass requires slightly different handling for optimal results:
If using stencils, secure them well to avoid overspray or bleeding.
Patience is key when painting plexiglass. Here’s what you need to know:
| Paint Type | Dry to Touch | Recoat Time | Full Cure |
| Acrylic Paint | 1–2 hours | 4 hours | 24–48 hours |
| Spray Paint | 10–30 minutes | 1 hour | 24 hours |
| Clear Sealant | 15–30 minutes | 2 hours | 48 hours |
Note: Curing is essential for long-lasting adhesion. Avoid touching or stacking the plexiglass until fully cured.
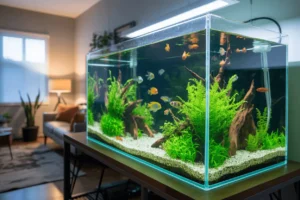
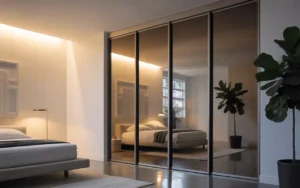
Painting plexiglass isn’t just for art—it’s also practical. Here are some common applications:
Reverse painting (painting on the back of the sheet) creates a glossy finish and protects the paint.
Always follow paint and sealant instructions carefully for best results.
Painting on plexiglass opens up an exciting world of creativity, especially if you’re aiming for a sleek, modern aesthetic. From signage to home decor to custom artwork, this material is an affordable, durable, and versatile choice. Just remember that the success of painting plexiglass depends heavily on surface preparation, paint selection, and sealing techniques.
By following this comprehensive guide, you now know exactly how to paint plexiglass the right way. Whether you’re brush painting or planning to spray paint plexiglass for a smooth finish, you’ll achieve long-lasting, professional results.
Ready To Start Your Next Creative Project?
Explore a wide range of high-quality plexiglass sheets available at Fab Glass and Mirror and turn your ideas into reality.
Yes, but it adheres best with light sanding and a primer. Use multiple thin coats for smooth coverage.
Priming isn’t mandatory but is highly recommended, especially for long-term projects or when using brush-on acrylic paint.
Yes. Just ensure the first side is fully cured before flipping it over. Reverse painting is popular for a smooth front-facing look.
Use rubbing alcohol or a plastic-safe paint remover. Avoid anything abrasive that could scratch the sheet.
Not if you prepare the surface correctly and use a proper sealant. Indoor pieces last years without issues.
Explore all things glass—from stylish table tops and insulated options to tinted and frosted designs. Discover guides on glass railings, custom cut glass, shelves, and stunning backsplash ideas for a modern home or office upgrade.