
My Cart
You have no items in your shopping cart.
However, leaving them uncovered invites a host of problems, from accumulating leaves and debris to flooding during heavy rains. It can also pose a serious falling hazard for pets and children.
Building your own DIY window well cover is an excellent, cost-effective weekend project that protects your basement while upgrading your home’s exterior. In this comprehensive guide, we’ll explore different design concepts, help you choose the right materials, and walk you through the exact steps to build a durable, weather-resistant cover.
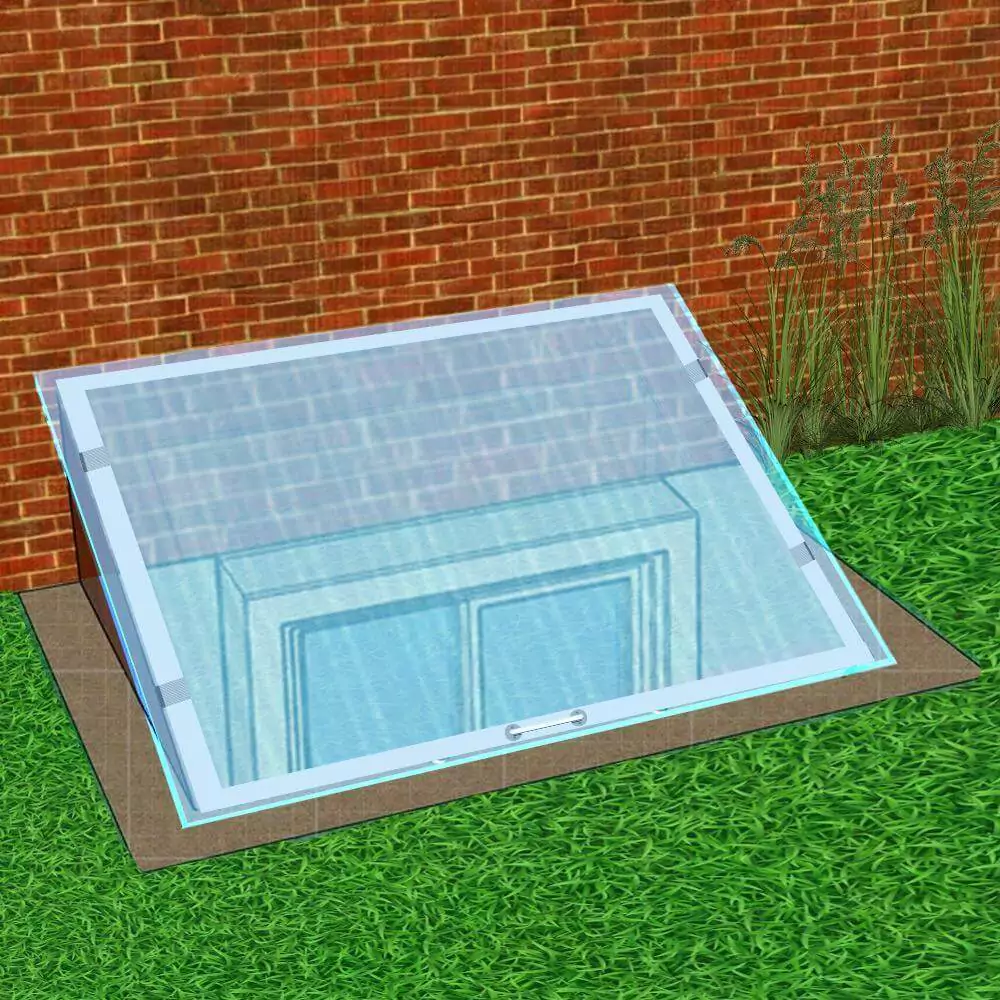
Table of Contents
Before gathering your tools, you need to decide on a design that fits your home’s architecture and your specific weather needs. Here are three highly effective DIY window well cover ideas:
If you live in an area with heavy rainfall, a flat cover won’t cut it. This idea involves building a simple, angled wooden frame (using pressure-treated 2x4s) that sits over the lip of the well. A flat sheet of polycarbonate is drilled into the top of the angled frame, allowing water, snow, and debris to effortlessly slide off away from the foundation.
For homeowners who want an invisible, minimalist look, the flush mount is perfect. This idea uses a thick, custom-cut sheet of heavy-duty acrylic that rests perfectly flat on the metal or concrete lip of the well. By using heavy-duty, rust-proof hinges attached directly to the foundation, you create a discreet “trapdoor” style cover that seamlessly blends into your landscaping.
If basement ventilation is your primary concern, but you still want to keep large animals and heavy debris out, consider a hybrid approach. This idea uses a customized aluminum or steel grate as the base, with a smaller, removable acrylic panel placed over the top during the rainy season. This gives you the ultimate flexibility between airflow and weather protection.
Well-sealed covers can help insulate the basement, reducing heat loss and improving energy efficiency.
When designed thoughtfully, window well covers can enhance the overall look of the outdoor area, contributing to the aesthetics of your home’s exterior.
Now, let us discuss some commonly used DIY window well cover materials. Here are a few of them:
Polycarbonate sheets are arguably the best material option for these well covers. That’s because polycarbonate is transparent; hence it doesn’t stop the light passage. Plus, it’s scratch resistant and can handle rough weather conditions.
Acrylic sheets can also be used for making window well covers. It has pretty similar properties to polycarbonate sheets. The plus point here is the liberty to choose various color options. So, for a bit of a customized feel, you can opt acrylic sheet.
Wood is also a decent material option here. It may not offer the best durability, but its cost (compared to other materials) is significantly less.
Last but not the least, we have the metal window well covers. They might be expensive, but they are very solid and durable.
Yes, you can install a window well cover yourself, provided that you follow the basic safety guidelines and have access to the right tools.
On the other hand, DIY installation always helps save some cost. Here is a brief comparison of DIY window well cover installation vs Professional Installations.
| Aspect | DIY Installation | Professional Installation |
| Skill Required | Moderate DIY Skills | Professional Expertise |
| Cost | Helps Save Cost | Ends on the Higher Side |
| Time | May Take Longer | Usually, Faster |
| Materials and Tools | Purchase Required | Mostly Provided By Installer |
| Quality Of Work | Depends On Skills | Professional Quality |
| Safety And Liability | You have to Follow Safety Guidelines | Installer Carries Liability |
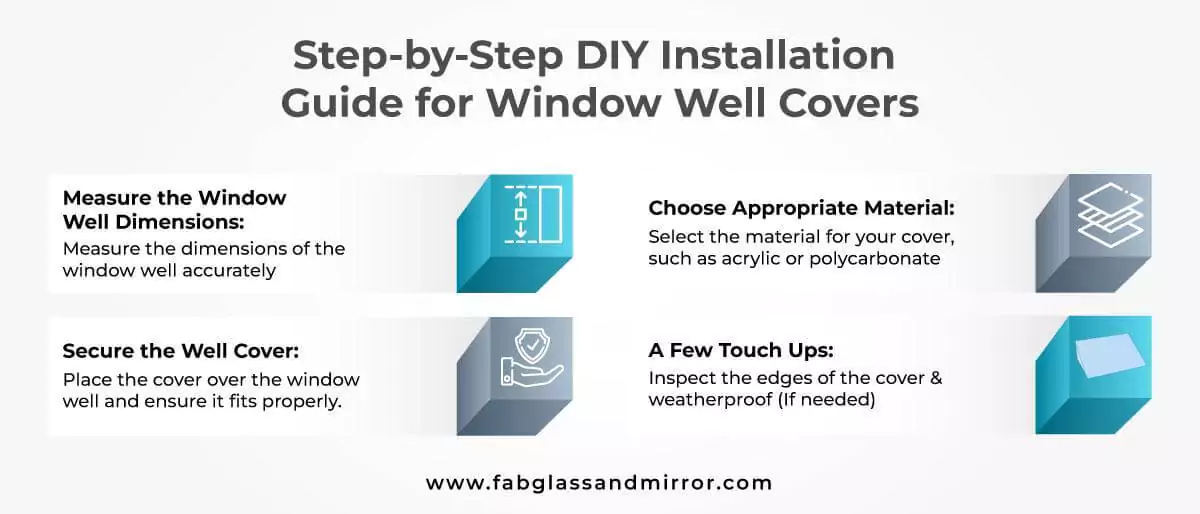

Building a window well cover requires precision to ensure it is safe and weather-tight. Here is exactly how to do it.
Tools You Will Need:
Measure the width and projection (depth) of your window well. Always add an extra 1 to 2 inches of overhang around the outside edge to ensure rain drips away from the well rather than straight down into it.
Cutting acrylic and polycarbonate can be tricky if you don’t use the right technique. To avoid cracking, melting, or shattering your new sheet:
Once your cover is cut to shape, it’s time to attach it. If you want the cover to be openable for emergency egress (highly recommended):
Attach the cover to the hinges. Check that the cover opens and closes smoothly. If necessary, attach a small handle to the underside of the cover to make it easy to push open from the inside of the basement in case of an emergency.
One cannot go against the value these windows well covers brings to your property. Here are some of their benefits.
Window well covers act as a shield, preventing leaves, rainwater, and pests from entering the window well, reducing the risk of damage and infestations.
They create a barrier that keeps children and pets from accidentally falling into the window well, promoting home safety.
Well-sealed covers can help insulate the basement, reducing heat loss and improving energy efficiency.
When designed thoughtfully, window well covers can enhance the overall look of the outdoor area, contributing to the aesthetics of your home’s exterior.
Once installed, a window well cover also requires some basic maintenance. Here are some tips to follow:
With all those exciting benefits, you want to ensure that your window well cover is well-built. For unmatched durability and customization, it is best to go with either acrylic or polycarbonate well covers.
As mentioned earlier, both these materials resemble each other a lot. They are durable and can be customized, too. Fab Glass and Mirror has top-quality acrylic and polycarbonate sheets available to best match your project requirements. We also offer free shipping and special discounts on various occasions.
Creating your own window well cover is incredibly rewarding when you have the right tools, a solid design idea, and premium materials. If you are ready to start building, Fab Glass and Mirror offers premium, cut-to-size Acrylic and Polycarbonate sheets. By letting us handle the precision cutting, you can skip the hardest part of the DIY process (Step 2) and get straight to mounting and securing your home. Get durable acrylic sheets today and upgrade your home’s exterior!
So, now you know pretty much all about various DIY window well cover ideas. In this regard, you can go with nearly any design idea. Your chosen material also plays an important role. For maximum customization and durability, polycarbonate and acrylic are the best materials.
We recommend buying acrylic or polycarbonate sheets from a reliable glass retailer. Buy your chosen polycarbonate sheets from Fab Glass and Mirror. On top of quality products, you also get free shipping and exciting discounts.
No, they should not be perfectly sealed. While your cover needs to block rain, snow, and debris, a small amount of ventilation is necessary. Completely sealing the well traps humidity, which can lead to condensation, window fogging, and mold growth against your basement foundation.
For a standard residential window well, a thickness of 3/16 inch to 1/4 inch is ideal. This thickness provides excellent structural integrity to withstand heavy snow loads, high winds, and hail without bowing or cracking, while still remaining light enough to lift easily during an emergency.
Standard plastic covers are not designed to support human weight. A 1/4-inch polycarbonate cover can easily handle heavy snow and wandering pets, but it will flex or crack under an adult. If foot traffic is a concern in your yard, you must build a hybrid design featuring a heavy-duty metal grate support system beneath the plastic sheet.
A cover will stop overhead rain and snow from filling the well, which solves the most common cause of window leaks. However, it cannot stop flooding caused by rising groundwater or poor yard grading. If your well fills with water from the bottom up, you need to clear your window well drain or adjust your home’s downspouts.
Not if they are designed to open easily. International Building Codes (IBC) state that any basement window well serving a habitable space must allow for emergency escape. To stay compliant, your DIY cover must be lightweight or installed on hinges, allowing it to be easily pushed open from the inside without the use of keys, tools, or special knowledge.
Both materials are highly durable, but they age differently. Polycarbonate has superior impact resistance (it won’t shatter), but it can yellow over time if not treated with a UV-resistant coating. Acrylic has slightly lower impact resistance but naturally resists UV yellowing and scratching much better, maintaining its crystal-clear look for years.

Explore all things glass—from stylish table tops and insulated options to tinted and frosted designs. Discover guides on glass railings, custom cut glass, shelves, and stunning backsplash ideas for a modern home or office upgrade.