My Cart
You have no items in your shopping cart.
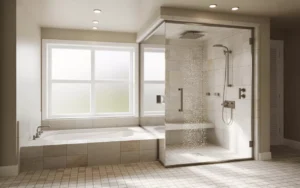
The shower is among the favorite places in most people’s homes. It is where everyone’s day starts and ends, where people get some private time and lock themselves to have some private time. Making the bathroom area, and more so the shower, of much importance. That is why your shower door should not miss a bottom seal strip. This will make your shower door waterproof and keep your bathroom dry. If you have a full shower enclosure, adding a bottom seal strip becomes even more crucial to ensure water stays contained within the enclosure. Not only will it make your bathroom comfortable to step into, but it will also prevent accidents and falls resulting from slips. Understanding the different types of shower bottom seals and how to install them will go a long way in keeping your bathroom dry.
Table of Contents


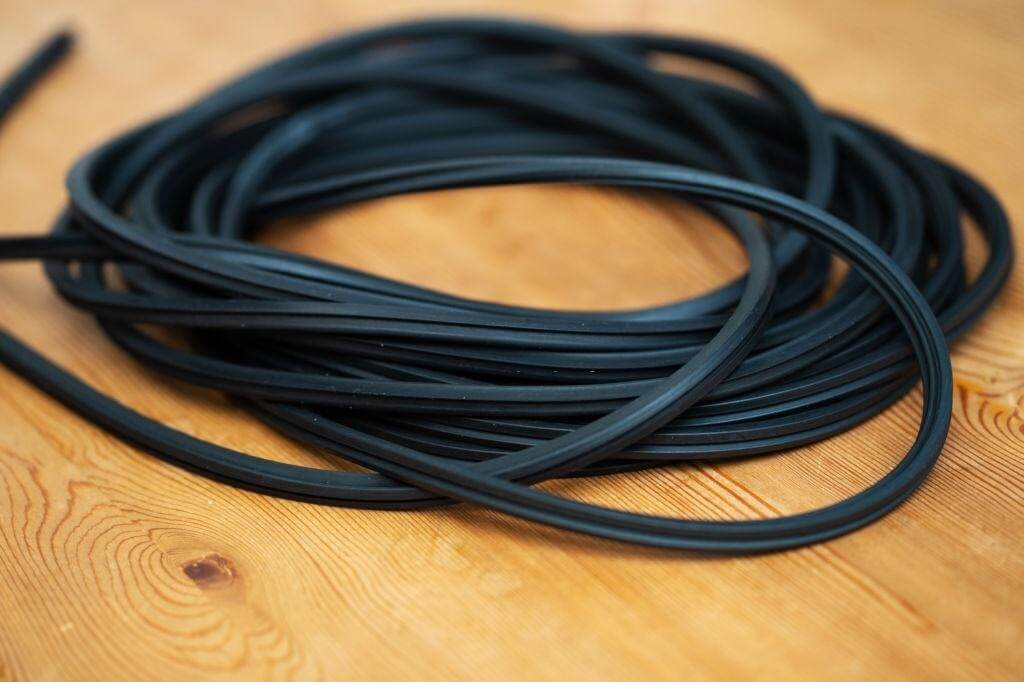
Shower door sweeps are usually made of plastic. They are hygienic, effective for keeping water in the bathroom’s confines, and very easy to install. Bottom shower seals come in various shapes and sizes. There are different types of shower door gaskets based on seal placement and sweep shape. Before choosing the right gasket, it’s essential to understand how to measure for a glass shower door to ensure a perfect fit. We will discuss some of the main types here.
There are four main types of shower door sweeps based on the points of installation.

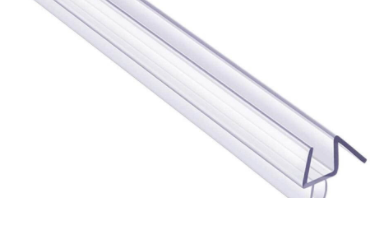
Bottom seal is the most popular shower door seal. It runs along the length of the door’s bottom, thus the name bottom sweep. One side of the sweep has a drip edge. The seal is installed such that this side faces the shower’s interior. Bottom sweeps can be installed conveniently by slipping them into the door bottom with your bare hands. These seals can be used on both frameless and framed shower doors, making them an ideal choice for cool bathroom doors with sleek, modern designs.

The side sweep is used to keep water from leaking via the side hinges of the door. Side sweeps are harder to install as compared to bottom seals, but they are very effective for making the shower area water-tight. When working on improving your shower’s functionality or appearance, considering options to refinish shower components can further enhance its overall look and durability.
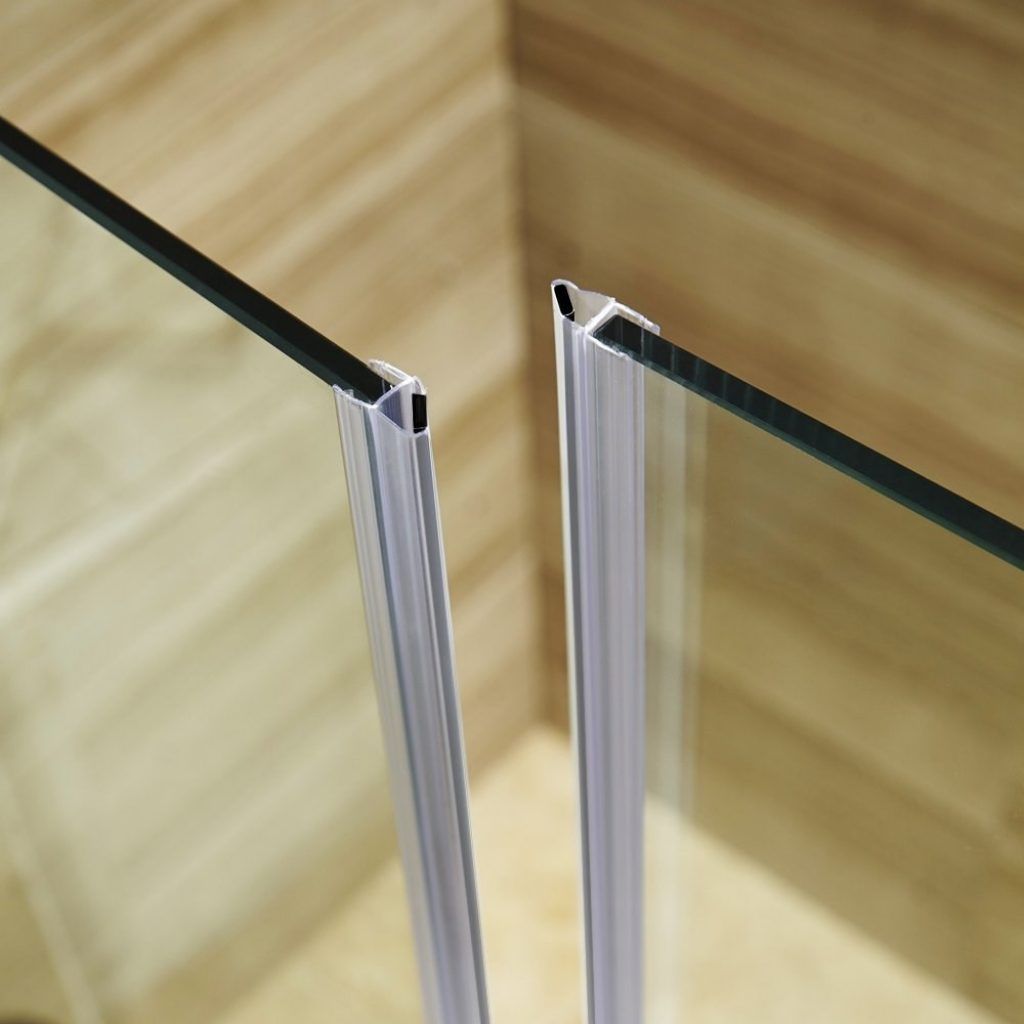
The door jambs, also known as the door stops, go along the length of the open side of the door. It prevents the door from unexpectedly slamming shut and shattering. The glass-to-glass door jamb is used in shower enclosures where the glass door is in contact with the glass panels. The door jambs are simple to install.
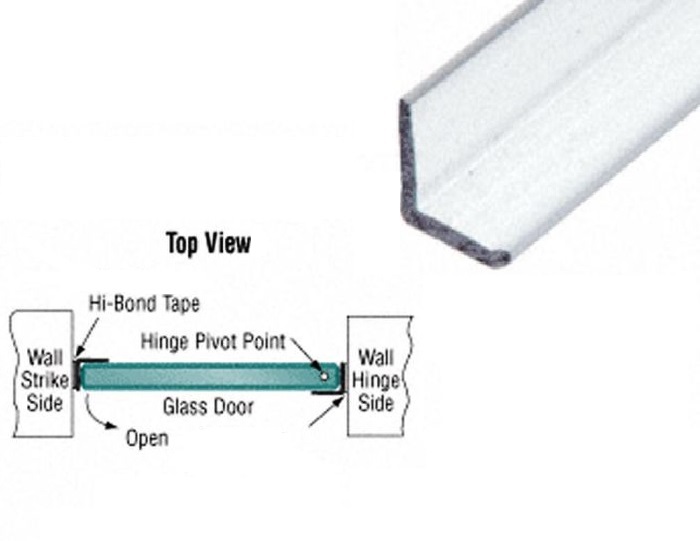
Shower enclosures with glass doors that close against the wall require wall-to-glass door jambs. These door jambs prevent the shower door from crashing into the wall and eventually damaging it.
Based on the seal design, there are three main types.
As the name implies, these seals are straight and retain their shape. Straight seals don’t bend therefore they are used for making rectangular, square and geometric shower enclosures water-tight.

Curved or rounded shower seals are properly contoured and adapted to secure the angles of round and circular shower enclosures. They are designed to make the curved shpwer cabins water-tight. Rounded seals come in different sizes and radius to cater for different shower enclosures.
Magnetic seals are equipped with magnets that help in keeping the shower door properly closed. The magnetic designs simplify the door operation, make the door connection tight and ensure a water-sealed shower cabin. Magnetic seals can be installed horizontally or vertically as per the shower enclosure design. These sweeps are very strong.
Sealing a shower door can cost you about $80-$500. If you are sealing the entire bathroom, then the price will be slightly higher. The cost will also be determined by the material and type of seal that you will use.
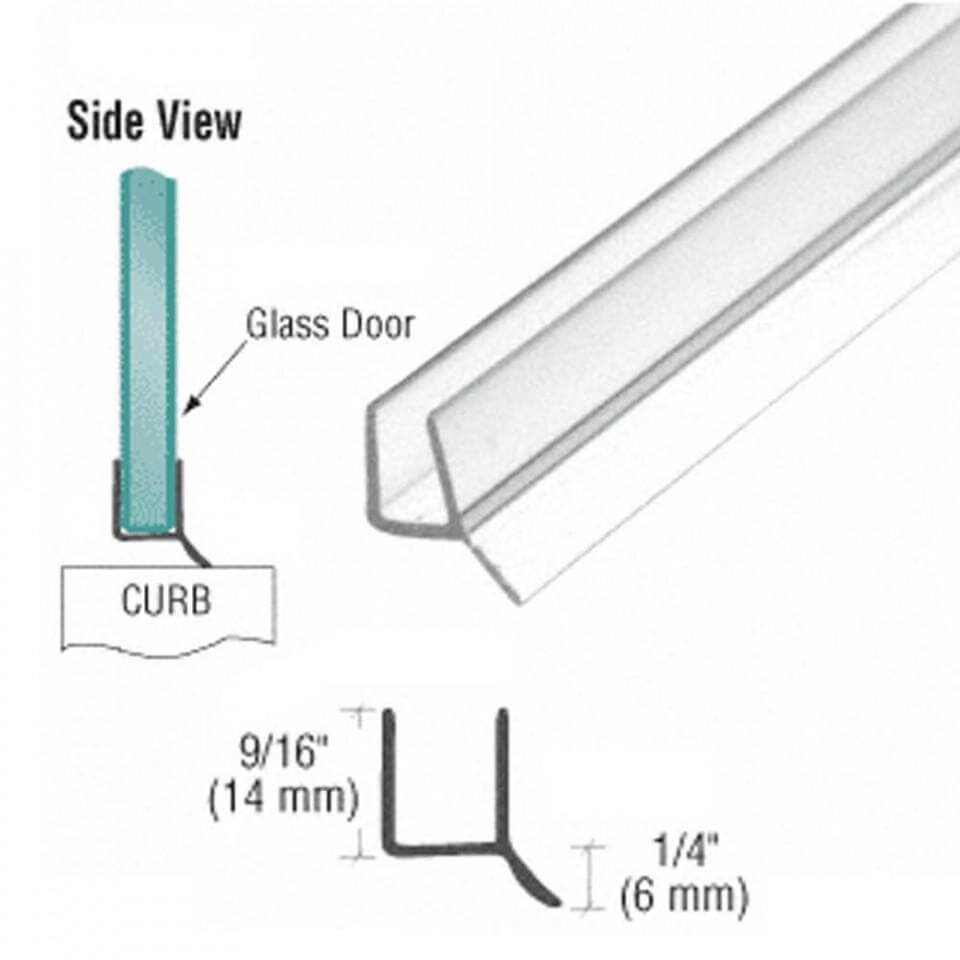
In order to select the right shower door water guard, measure the gap between the exposed edge of the glass panel and the shower rim. Next, you would need to measure the length and thickness of the glass door to buy a shower seal of the right size. Take the tape measure and measure the width of the door and the thickness of the glass panel. Note the measurements and buy the shower door sweeps that fit the door. Most shower doors feature 4-6 or 7-8mm shower door drip rails. However, if you have a custom door, the dimensions of shower door gaskets might vary. Understanding these measurements can also help you estimate the glass shower door replacement cost, should you need to replace the door in the future.
Taking measurements of the glass and gap before selecting a seal strip is essential. However, if you miss this step, you can always cut it to fit. For the seal strip to be useful, you must get the right size.
If you have the accurate shower door measurements in hand and buy the right shower door water guard, you won’t have to cut it to size. However, in case the shower seals don’t exactly go with the door dimensions, you can easily cut it to fit the door. Cutting the shower door sweeps is quite simple. You only need a simple hacksaw to fit the shower seals to the door size.
Shower seals are mostly installed at the door bottom. However, side sweep and door jambs are also used to make the shower carbon fully water-tight. The bottom shower door gaskets can be installed on frameless as well as framed shower doors to keep the water from flowing out of the shower area through the small gap between the shower door and curb. The side sweeps are used to cover the small opening in the door hinges whereas the door jambs prevent the pivot shower door from slamming open and shut. You can install any shower door water guard as per the shower enclosure specifications.
The first step for installing shower seal strips is by replacing the existing one. They are usually easy to remove.
First, inspect how the seal strip has been attached. There are usually two attachment methods. The seal can either be slid into channels found below the door or be installed between the shower door drip rail and the door base.

If the attachment technique is the channel, all you have to do is pull out the strip from the rail. If installed between the base of the door and drop rail. Remove the drop rail to access the strips. All it takes for the latter is removing the screws used to secure the shower door drip rail.
Once done, clean the rail or channel with a clean rag and ammonia.
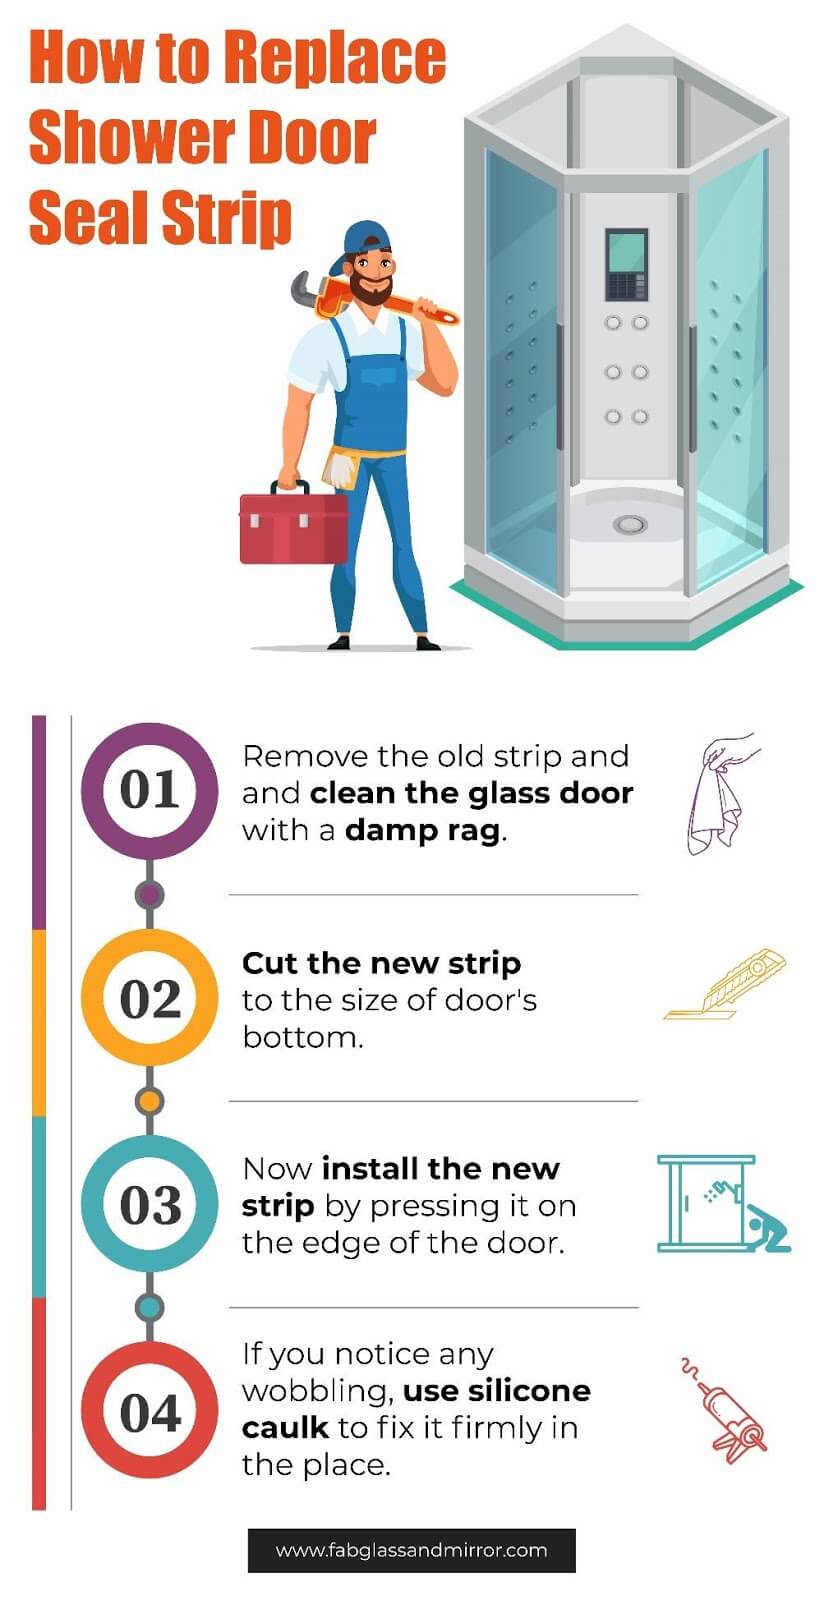
If you did not select a custom cut strip, trim the seal strip to fit the door’s bottom using scissors or a craft knife.

UUsing the damp cloth, clean the track to prepare for installation. Remove all the residue and mildew on the glass and track where you will be installing the seal.

Once the area is ready for installation, attach the cut strip by pressing it at both corners of the door. From one end of the door, press down the seal, working your way to the other end of the door.
Ensure that the seal sits are correct and tight.
The chances are high that the seal will be overlapping after installation. Use the scissors or craft knife to cut the overlapping seal.

Replacing the shower seal is a pretty easy job, provided you have the right materials from a reputable glass and mirror company. The guide above will walk you through a successful DIY shower door seal strip installation, including how to get a custom cut seal strip that will fit perfectly. Doing a regular replacement is also vital to ensure the effectiveness of the seal, and sourcing your materials from a trusted glass and mirror company ensures durability and quality.
Explore all things glass—from stylish table tops and insulated options to tinted and frosted designs. Discover guides on glass railings, custom cut glass, shelves, and stunning backsplash ideas for a modern home or office upgrade.