


My Cart
You have no items in your shopping cart.
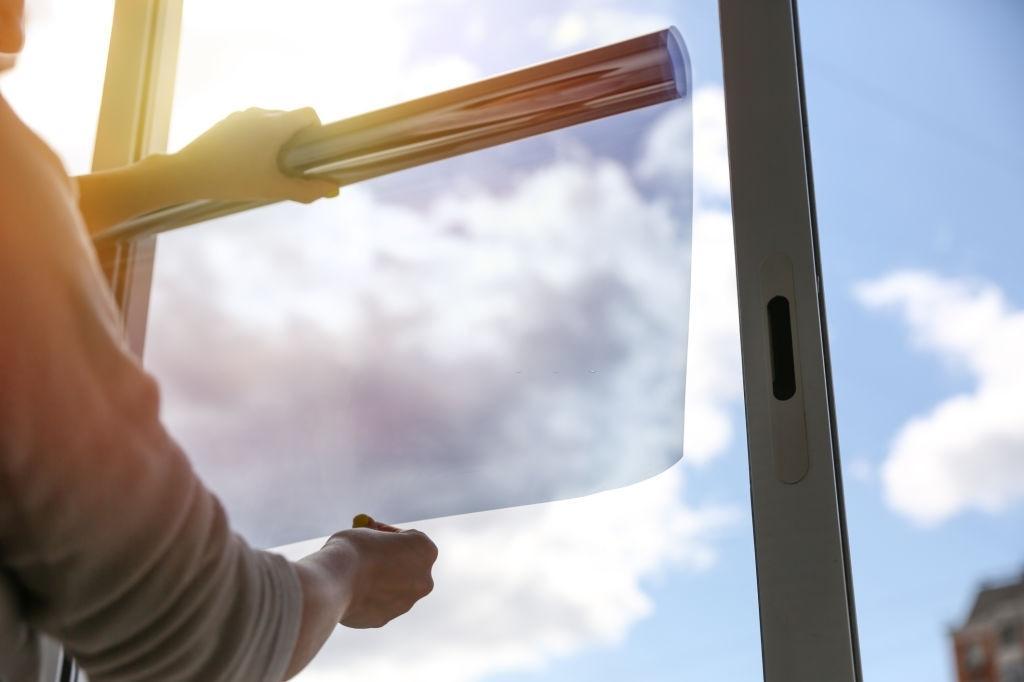
The window films look very elegant and they preserve the indoor furnishings. They have been in abundant use because of their lots of astonishing benefits. Not only that, they change the aesthetic of your house and prevent the discoloration of your window panes, upholsteries, paintings, and tapestries.
After a few years of installation of these films and tints, they start to have tarnish, bubbling, and discoloration which gives a very bizarre look to your house. Once these films have worn out their time, they can’t be fixed. The only option is to remove them and install a new one. In this guide, we will discuss some methods and the step-by-step procedure of removing your tint and films from scratch!
Table of Contents
Window films are made of synthetic material. They are available in the market in various sizes, colors, and shapes. You may pick it out according to your taste and choice! They look perfect in the house and also match the color scheme. They come in a range from sliver shades to neutral tones.
Window films are an excellent product to save your indoors from harmful ultra-violet radiation coming directly from the sun. These UV rays can be very fatal and they can cause skin rashes, cancer, and other skin problems.

There are some reasons to remove the films rather than looking at old and scratchy windows. Below mentioned reasons can’t be ignored and you will have to change your films and tints if it’s needed.
After a few years, the color of the tint and film starts to fade. Such a condition calls the attention of the owner because, despite the looks, the tint becomes unable to protect the indoors from the UV rays and regulate the inner temperature. Sometimes, the tint becomes purplish and the dye becomes irreparable.
Bubbling looks very bizarre and it creates a mess and this condition can’t be outdone. Some people try to remove the bubbling by separating the tint but they end up creating a huge mess. It usually happens because of the failing adhesive after some years. Removal of the film is the best way to avoid it!
When these films become old, not only the dye starts to fade but also, they start giving a very horrible look. And their inability to protect the indoors from harsh climates, UV rays, and dullness makes it a huge turn off for people. Therefore, make sure to replace the film when you start seeing the fading in the dye.
They look dingy and disrupt the whole aesthetic of your house. Removing the film and tint may be the best option for you.
There are many ways to remove the window films but, in this guide, we will discuss two methods of removing these window films by scratch!
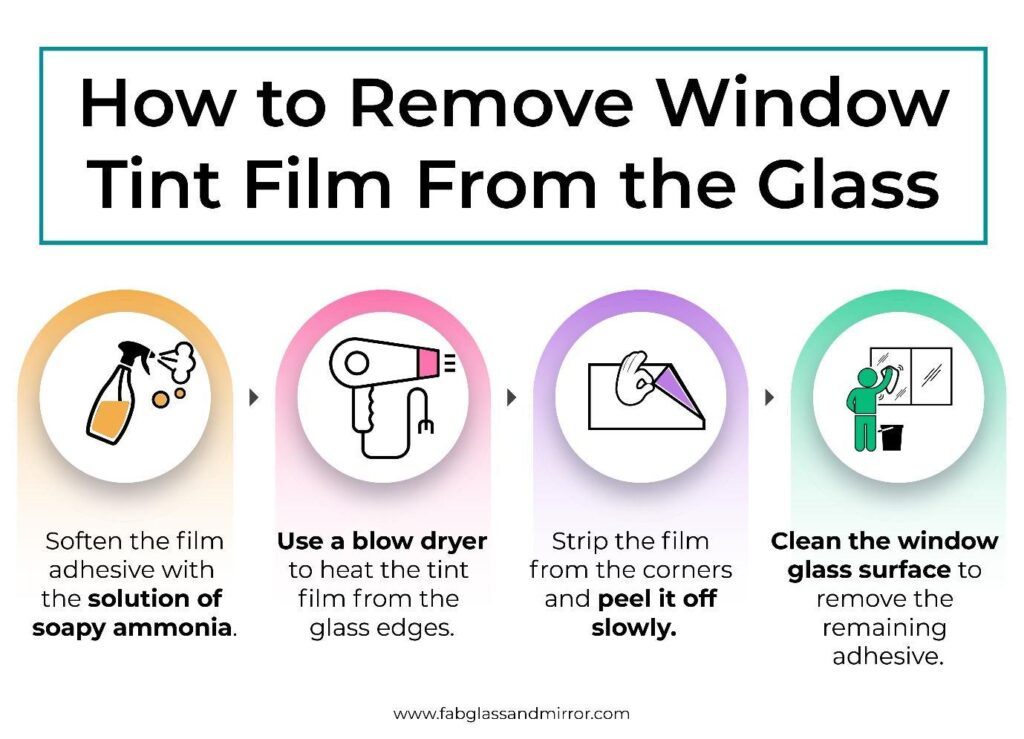

Firstly, fill a plastic spray bottle with the solution of soapy ammonia and spray the solution on the window film until it is drenched. Let it sit for several hours before it dries out. This step may take a little longer than you anticipate.
To fasten the process, you can wrap a plastic cover all over the window film. Let it be wrapped for a night, it will trap the moisture and soften the adhesive.
Note: Ammonia fumes can be dangerous for health, allow proper ventilation especially in small spaces.
Using a hand steamer and a blow dryer heat the tint as you slowly pull it off. Daytime is ideal to remove the tint because the heat allows the tint to easily peel off. This way there would be no scraps of tint portions on the adhesive. And, the tint will be separated from the window nicely.
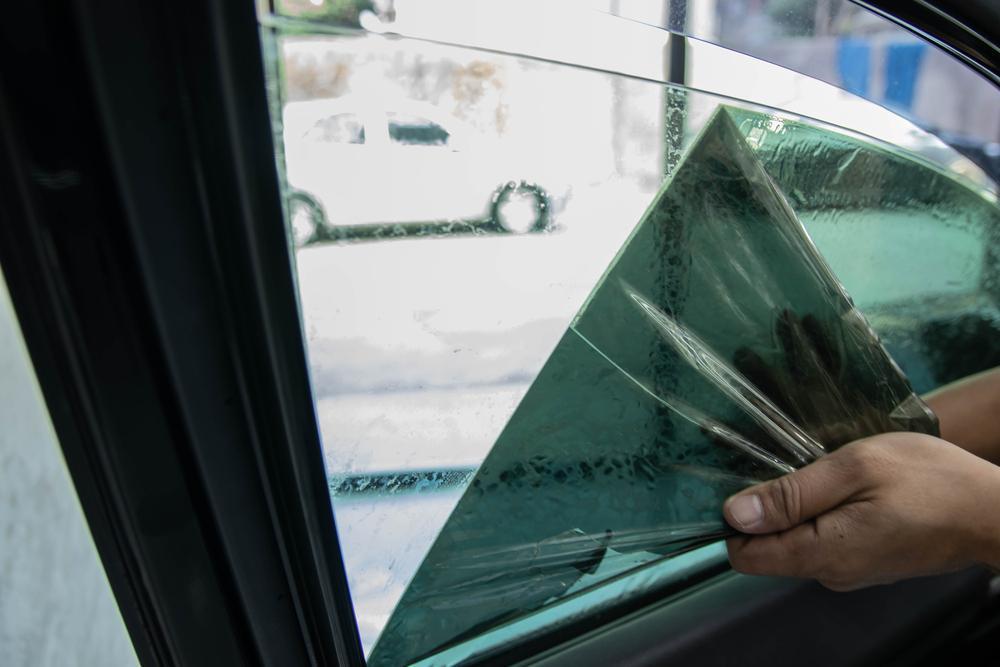
After removing the tint, peeling off the film will take less time. The sheet becomes weak and comes off nicely. To remove the film, use a razor blade and strip the sheets from the corners. Apply heat using a blow dryer with one hand and with the other handset an angle to peel the film with a sharp razor blade.
After peeling the film make sure to wipe the dirt and sticky residue. You can use an ammonia-based cleaner or simple water for this purpose. The choice is yours.

Use a spray bottle and spray the soapy water on the film to reduce the toughness of the film. Now using a scraping knife start peeling the film from top to bottom. Repeat the process until the whole sheet is peeled off.
Complete the removal of the film by cleaning the surface of the window with water. This way the extra residue or stickiness due to the adhesive can be cleaned out. It will allow you to install a new film on the window without any trouble.
Summing up!
Want to save yourself from peeking in the eyes of strangers? Window films allow you great safety and privacy. With their numerous benefits, there are some drawbacks as well. Which compels people to remove their older films and install new ones! Using this guide remove your old, dingy, and worn-out films and replace them today!
Explore all things glass—from stylish table tops and insulated options to tinted and frosted designs. Discover guides on glass railings, custom cut glass, shelves, and stunning backsplash ideas for a modern home or office upgrade.


